Green Team!
Technical Review!
Presentation Video
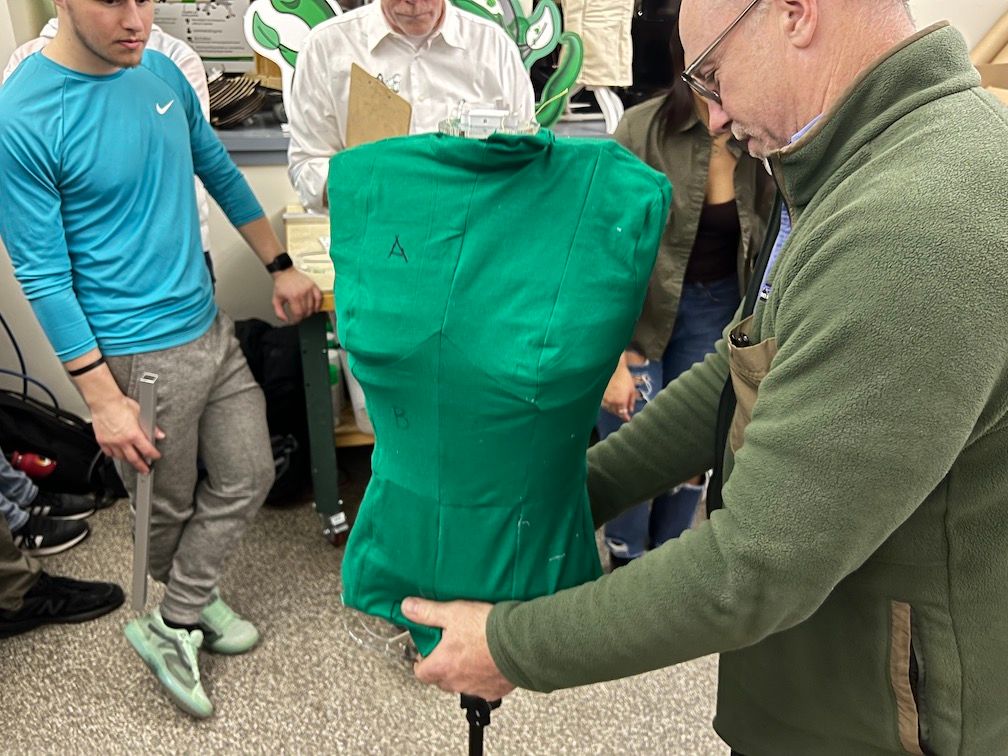
Figure
A display-style mannequin designed to collapse for transportation, making travel with the device easier for all designers, from semi-professionals to hobbyists.
Product Contract
View Product Contract in New WindowPhotos


Reviewer Feedback
Peter Nielsen
Feedback
Awesome Green Team: you have done an impressive job developing your concept, It works and seems to fulfill your specs and ambitions. If that is true then the challenge might be to really productize the prototype - what fabrication methods might allow a lightweight and cheap “family” of profiles to accommodate different sizes? What is the smallest and lightest total package (stand and mannequin) for travel? Can you source a stand that has your 1” square as its vertical member, or alternatively somehow “key” your profile segments to a round tube and eliminate the square tube addition? Are there accessories that might live in a pouch under the bottom profile plate - needles, ripper, sewing supplies? It would be valuable to quantify the cost of the outer (multilayer) jacket - it looks expensive to make. If the target is display only then perhaps only the front needs the multilayer cover; one doesn’t see many mannequin derrieres. The profile plates might be more highly skeletonized if they remain acrylic to manage weight, but can they be multi-ply cardboard, thin plywood, the structural foam that Danny mentioned? If they were foam of any sort and the square tube remains the vertical solution, then a constant acrylic “core” common to every profile plate could interface the tube and have a star, an array of radial spokes and the square center hole to form the basis of each foam plate, molded into the foam outer structure. Or that core could be a thin sheet metal stamping. Your team has followed a methodical path to a valid result, bravo!
Nathan Phipps
Feedback
Hi green! Great work again and hoping you all had a restful thanksgiving. Sorry for the long feedback, mostly technical info, so feel free to come ask me. TLDR "Eliminating wrinkles on outer surface is critical to making this read as a mannequin/body." First, great work, you are really coming along, i love the soft thread connections and the magical transformation as the plates descend to form the torso and the nice locking mechanisms. I see you biggest challenge as eliminating wrinkles. In order to read as a representation of a human body the textile needs to be smooth like skin otherwise it will read as clothing and will look like clothing underneath the clothing being displayed. The challenge could be solved by simply using a highly elastic textile however this will compress your batting and highlight your skeleton. So the balance becomes number of skeleton cross sections, thickness/density of batting, elasticity of outer textile. Regarding the the cross sections, i would imagine that as you increase number of units you decrease compressive forces on the individual unit, meaning there should be little structural cost to having more, thinner, units. Consider using 1/16" birch plywood, we have some in the PDL, this might offer you 4x the number of units for the same total stack height and be relatively stiff as compared to a polymer. Regarding your textile layers I can see three potential paths towards getting smooth outer textile layer. First is using materials similar to what you are using now, but adding elastic compressive panels and improving patterning/fit. First patterning, you want to pattern directly off of your form. Don't worry about CAD right now, if you want you can scan your hand made patterns into cad later; because you have the physical mannequin the fastest way to a highly accurate pattern is the tape and slice method. You can do this in a very careful, accurate way. Consider using a laser level for highly accurate vertical lines and doing a vertical line only pattern, this will ensure even compression especially around the bust where your current cup lines are affecting a good fit (remember patterning on a rigid form is different from patterning on a soft body, the rigid form will never "fill" the textile). (If you really, want to do this in CAD i would recommend getting your mannequin model into Rhino, which is a surface modeling software and allows easier creation of "meshes" and unfolding of patterns.) Once you have a nice accurate pattern you can add tension panels using an elastic textile.To create these panels simply replace a piece of your non-stretch textile with a slightly undersized piece of stretch textile (undersized so the elastic is highly engaged). You may need a few of these panels, one on each side and perhaps one on center line. You may need a few layers of elastic textile or some heavier elastic bands (you can buy these at sewfisticated) to get the level of compression you need. Second possible direction would be neoprene, which would combine your padding/pinning and smoothing layers. working with a 3-5mm neoprene would hide a lot of the skeleton. With thinner neoprenes (1-2mm) you can sew them like a regular textile, with thicker neoprenes (3-4mm) you may want to use a zig-zag stitch to butt joint the thicker material. You may also choose to simply glue/tape neoprene pattern pieces, especially if you go very thick (5-7mm). There are heat reactive tapes specifcally designed for this which i have in stock in PDL. Contact cement can also be used to hold butted edges together while being taped/sewn. Upside to neoprene is that you may be able to get away with one layer which does all the functions esp. if you use a thick neoprene. The third possibility i see for materials is similar to the first but using entirely stretch materials. This will be the easiest and cheapest (for manufacturing) way to get a smooth outer surface but will require some experimentation with thickness/density of batting and the number of skeleton plates. You patterning can be very simple and rely mostly on the stretch to take the form of the skeleton. Consider thicker power mesh or a double layer of a thinner power mesh.
Juhan Sonin
Feedback
Feedback in a PDF: https://www.dropbox.com/s/yxclsshape7fbkn/MIT2009_Green_TechReview_Feedback_Sonin_Fall2022.pdf?dl=0
Keith Clavin
Feedback
Great progress on the product! It was a strong idea from the beginning nut it has really come a long way in its iterations. Getting to see it up close and handle it gave me a few things to think about. Imagining myself as a possible user , I think one aspect to consider might be the weight. It seems like you are aiming for some type of optimization between a rigid frame and lighter/portable material for the rings. I believe the product contract states 10 lbs as a standard use case for the weight of a garment--is this the total weight of a garment or the amount of pressure on a given location, such as the shoulders? A little more granular detail as to exactly how much you expect it needs to carry and how much you really want it to be able to hold at a given point might allow a few alterations as to the materials. Maybe the shoulders can be the heavier, more durable material and the rest of the shape can be lighter, more flexible? The current weight certainly seems low enough to make it a preferable option to a bulky conventional mannequin, but it may also be an opportunity to make the distinction even greater by lightening your a bit more. In terms of the tripod mechanism, I was a little unclear on how exactly that functions as a travel component--would the bottom part of the tripod already be available at a given location or would you need to bring that as well? Maybe I just missed something in the demo...The presentation itself did a nice job of using the product and putting it into action in a way that mimics a real-world setting. Also, good work getting a number of people involved in different ways during the demonstration.
Jordan Tappa
Feedback
The model is really coming along. Consider carefully the full journey of your user: What does it look like when they open their suitcase to grab the mannequin (how the pieces are stored), what it's like to deploy the stand and deploy 'figure'. I think the strings between rings were a great choice and now implore you to reduce the footprint of each ring as well as overall weight of the product. Lastly, the final batting layer is interesting, and gets across what you were attempting (hiding the rings) however there was a fair amount of friction between the type of fabric and the dress you put on it, leaving a look that needed a bit of adjusting to correct. I wonder if undersizing that outer layer just a bit more would help, so that you can have the stretched canvas quality that industry mannequins have.
James Penn
Feedback
Great job so far. I wonder if using a single matte black (ideally, Vantablack, etc.) fabric (spandex?) cover could achieve a similar masking of the rings/ribs with less chance of wrinkling or other unsightly artifacts, simply by giving the eye fewer visual shape cues. Increasing the number of rings while decreasing their individual thicknesses might also help with that.
Ellen Roche
Feedback
Hi Green! I tried to summarize some of the staff discussions and my take on things here. I hope this format is helpful and saves you some time. We are here for you for whatever you need in the next 13 days :) ● Structural foam for segments (Smooth-on, Reynolds Advanced Materials) with common core made from something more rigid. ● Eliminate wrinkles on outside - neoprenes? ● Heat reactive tapes ● Stretch materials - spandex? vantablack? ● Rubber skin? Think about type of skin used for dummys. Again Smooth-on have really great artificial skin that you could brush on to a mold. Worth a trip to https://www.reynoldsam.com/ - Electric Avenue Boston. It's a great place ● What happens if you increase the number of rings, decrease individual thicknesses? Go green!!!